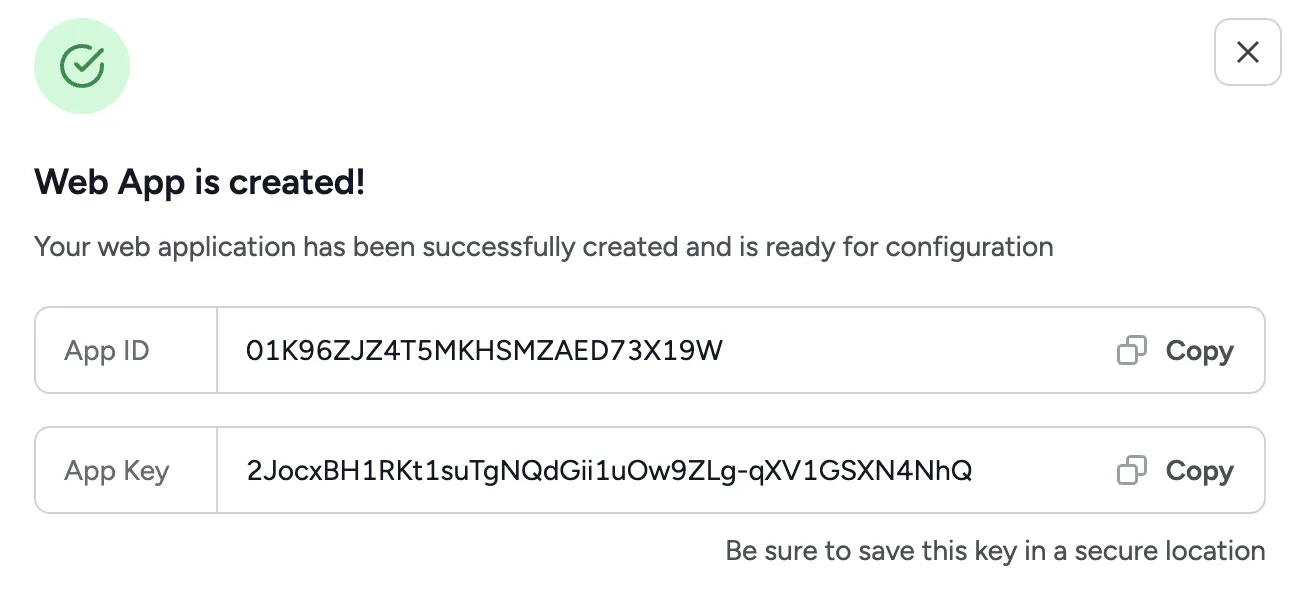
Creating an app
Go to Integrations and click Add new app to generate your credentials: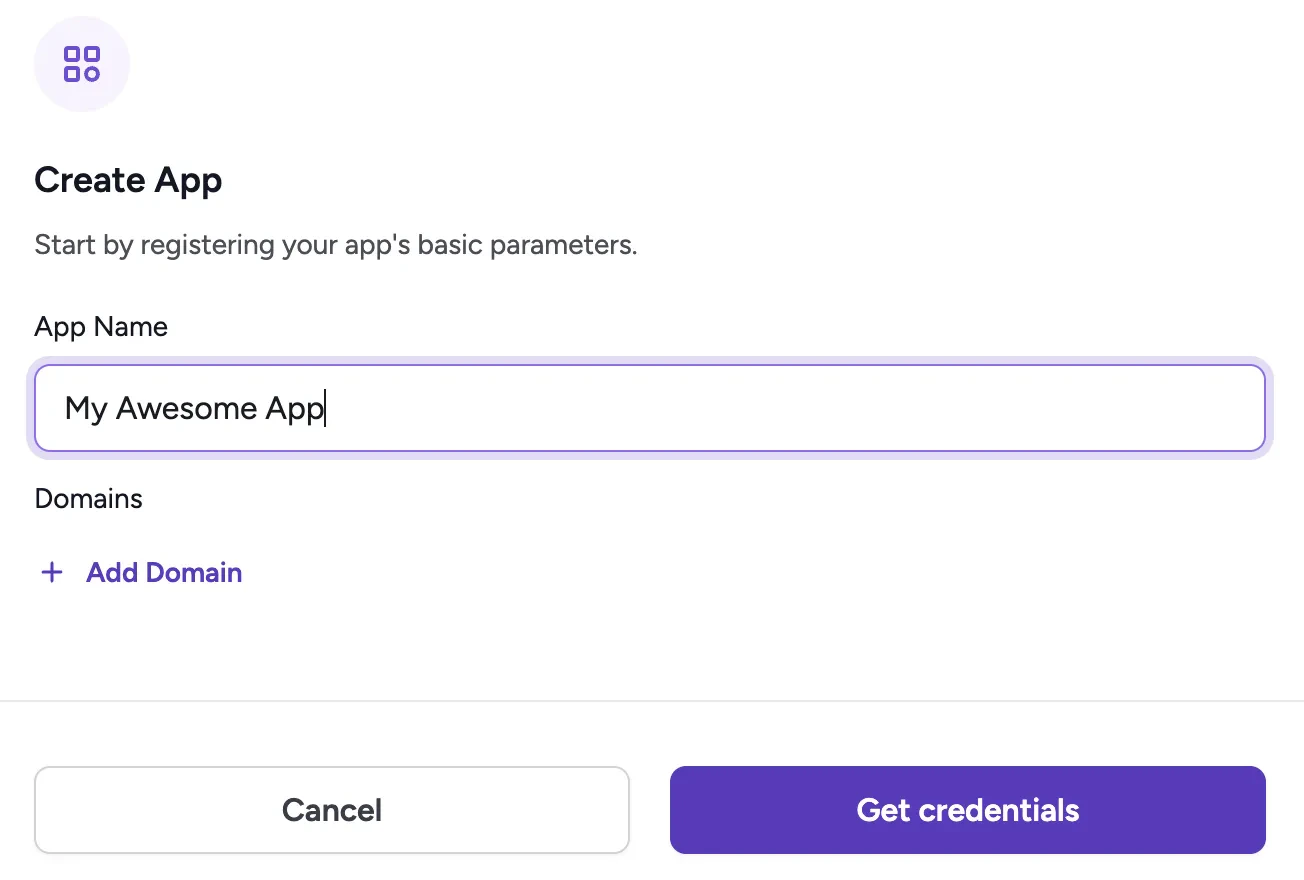
You can have as many Apps as you need. This lets you manage Clickwrap Templates for different products.
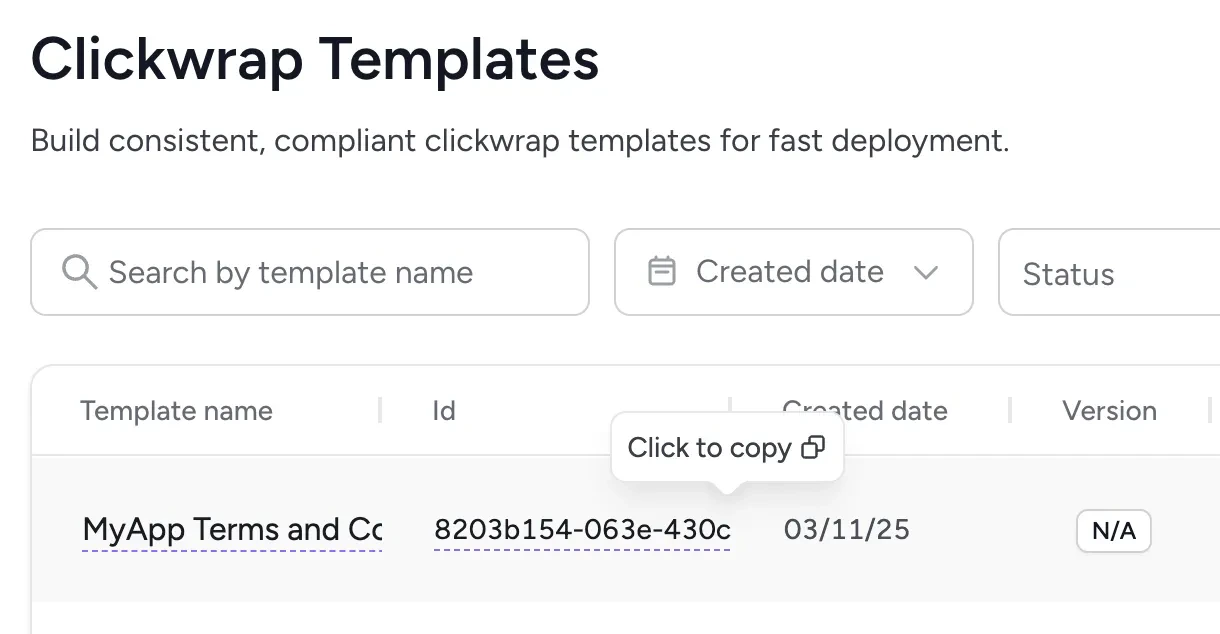
Creating a template
Create a new Clickwrap Template in the Templates menu. Use the rich text editor to write your agreement content. You can insert dynamic placeholders from the sidebar to personalize the clickwrap for each end user.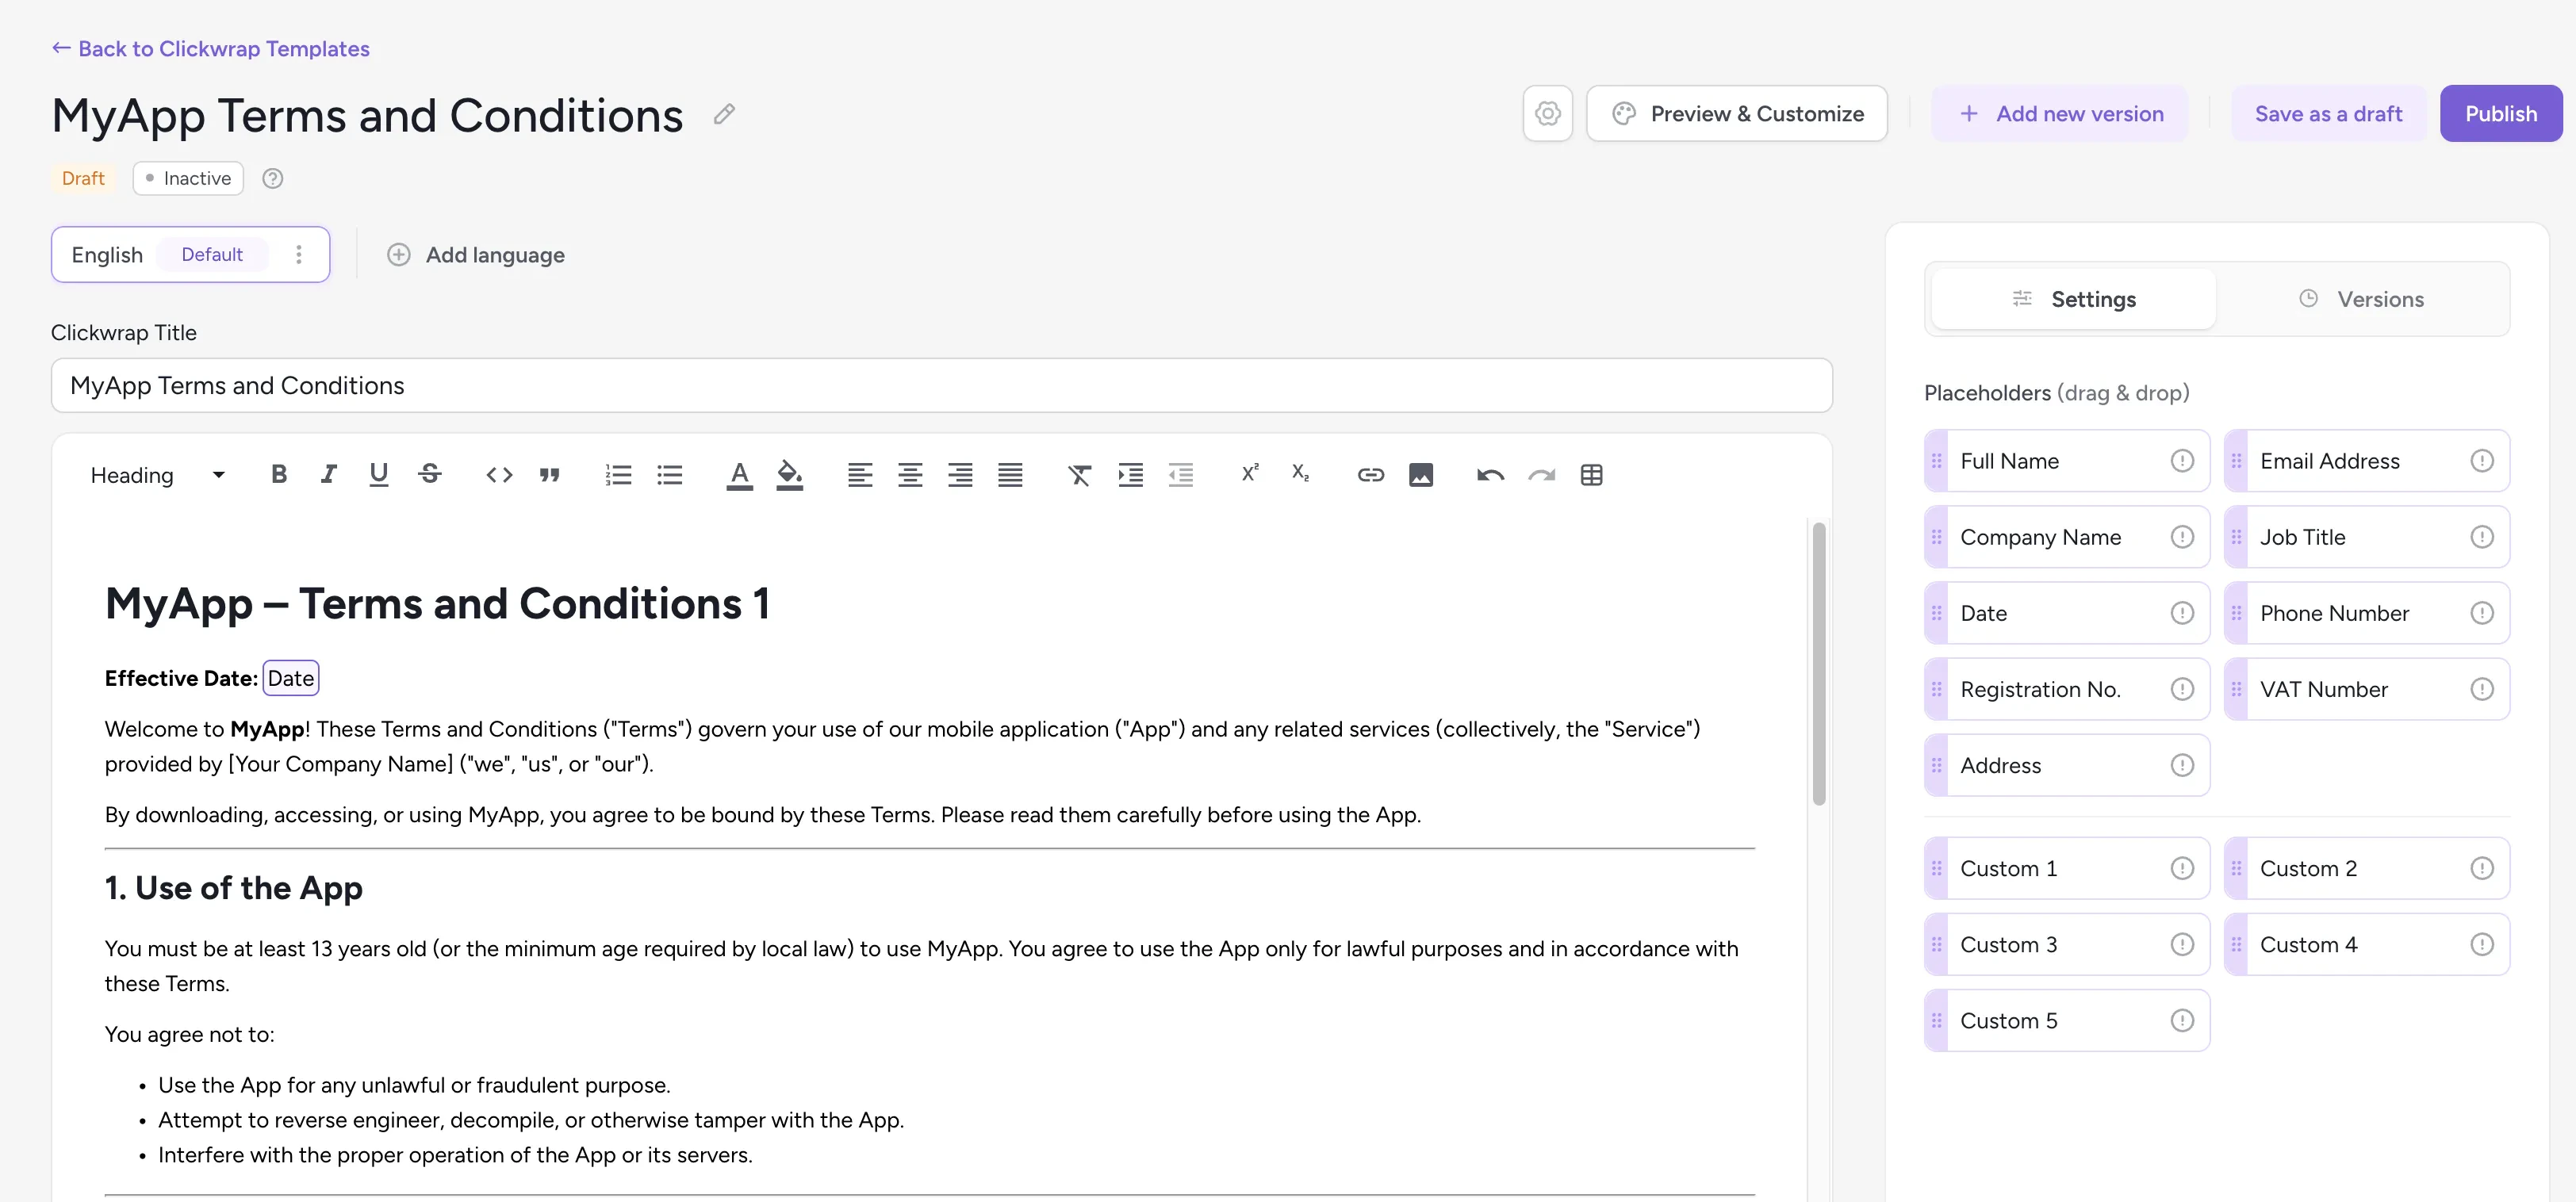
Publishing your template
You can save your content as a Draft at any time. When you are ready, click Publish — this locks the content and saves it as a new version. You can publish additional versions in the future if you need to make changes.
- Acceptance deadline (
mustAcceptBy) — The date and time by which end users are expected to accept the clickwrap. This field is optional and serves primarily as informational guidance; it does not automatically block access or enforce acceptance. - Effective at (
effectiveAt) — The date and time when the published version becomes effective and is presented to end users. Before this time, the previous version (if any) remains in effect. Note that the active version is determined by this timestamp, not by publish order — a newly published version does not become current until its Effective at time is reached.
The date and time you see in the ClickTerm UI are in your browser’s time zone. They are automatically converted to UTC when processed.
Enabling the template
After publishing the template content, you must Enable the template from the Templates table to make it available for client clickwrap requests. You can Disable the template at any time to stop new requests from using it.
Next steps
Quickstart — Web SDK
Integrate ClickTerm into your web app.
Quickstart — Android SDK
Integrate ClickTerm into your Android app.