> ## Documentation Index
> Fetch the complete documentation index at: https://docs.clickterm.com/llms.txt
> Use this file to discover all available pages before exploring further.
# Integrations
> Connect and manage the applications linked to your ClickTerm workspace — create apps, manage API credentials, and control access.
The **Integrations** page shows all applications and platforms connected to your ClickTerm workspace. Each integration represents a mobile app or web application where your clickwrap flows can run.
This page helps you monitor which integrations are active, when they were added, and how they connect to your templates and events.
Setting up or maintaining an integration? See the
[Developer Documentation](/dev/introduction) for API references,
authentication, integration examples, and event handling guides.
## When to use this page
* Connect new applications to ClickTerm
* Verify if an integration is active or disabled
* Troubleshoot issues by checking which integration generated events
## Integrations table
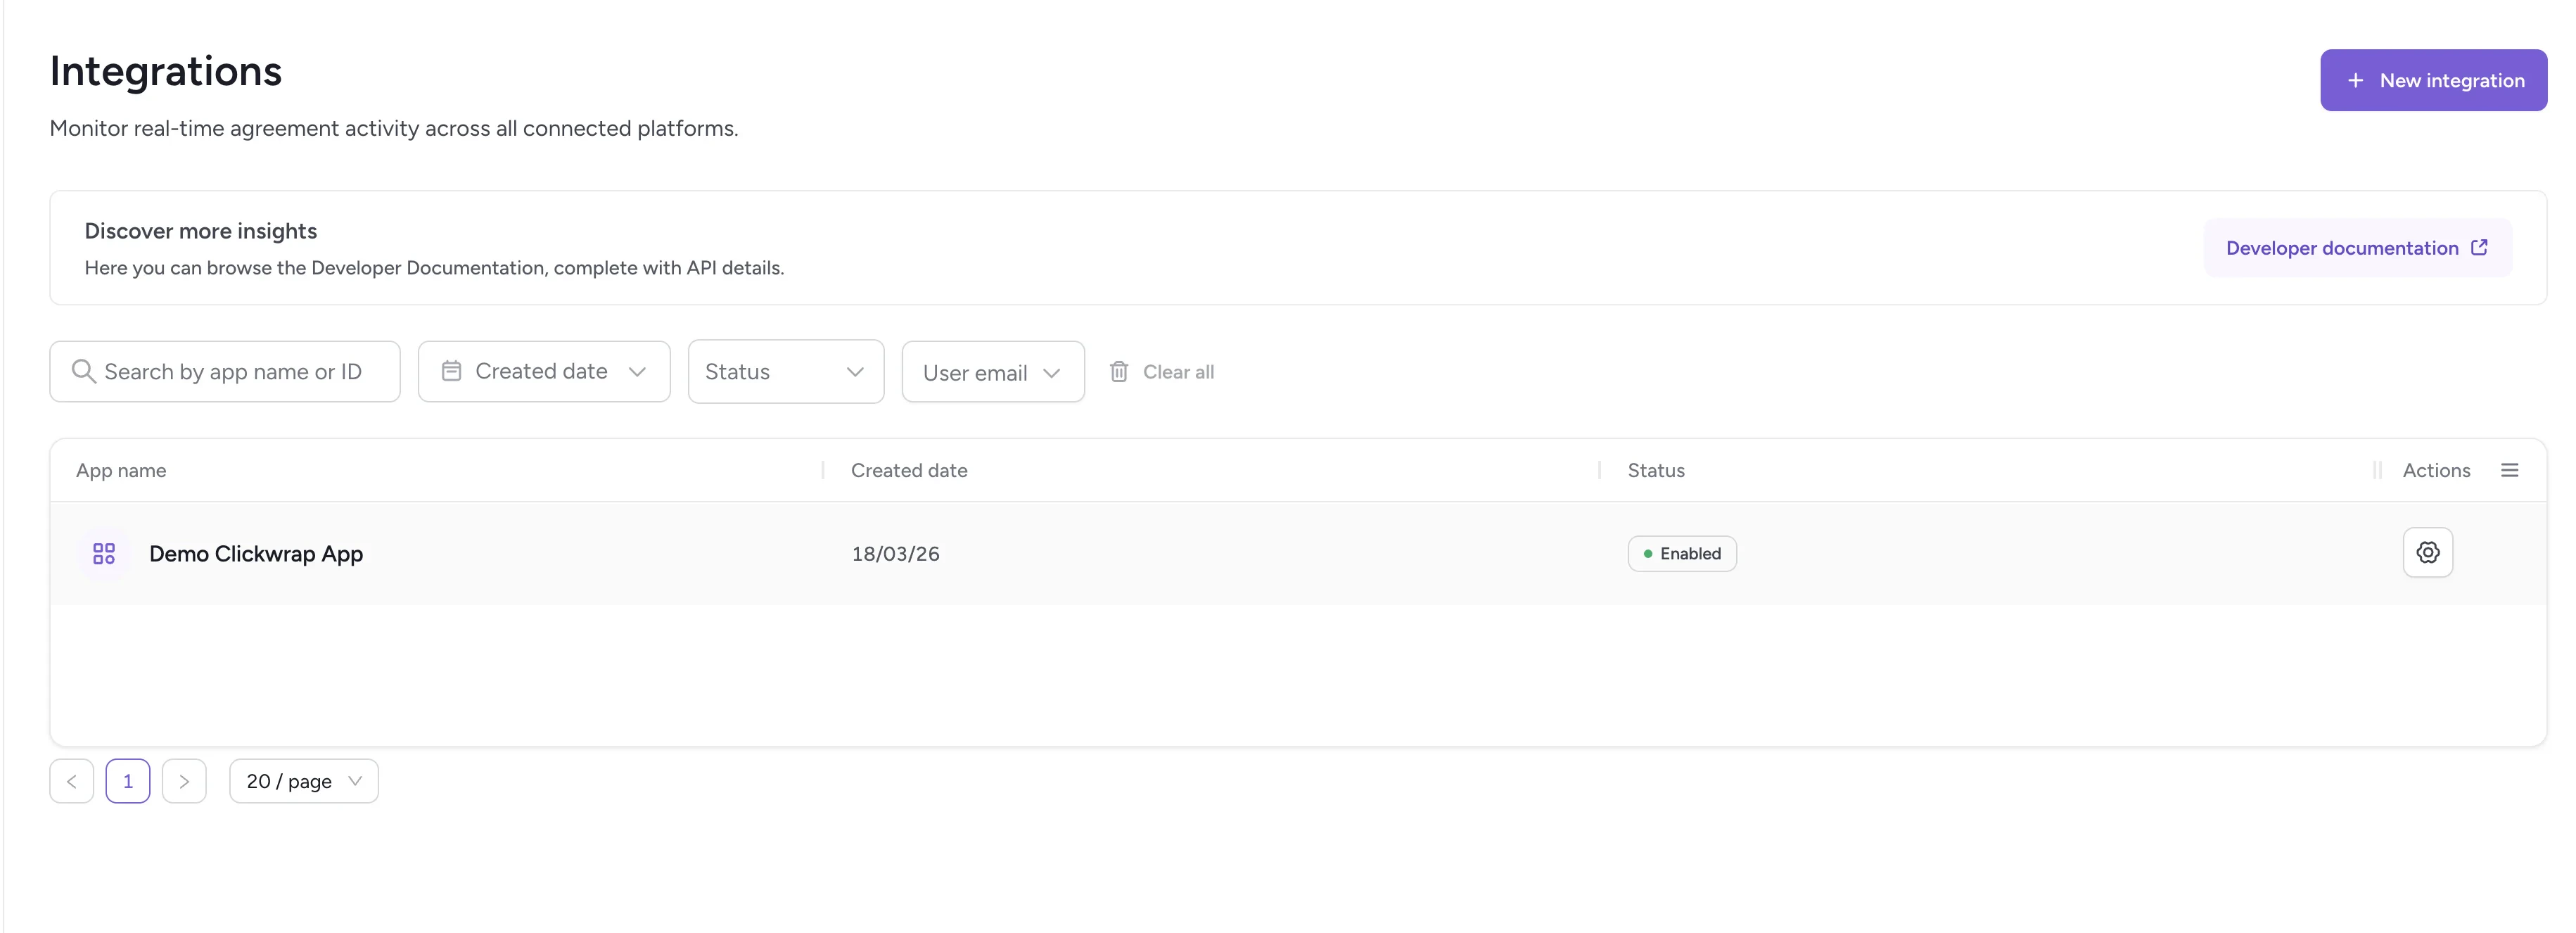 Each row in the table shows:
| Column | Description |
| ---------------- | --------------------------------------------------------------------- |
| **App name** | The display name of the integration |
| **Created date** | When the integration was created |
| **Status** | **Enabled** (active, users can interact) or **Disabled** (turned off) |
| **Actions** | Open integration configuration |
## Integration configuration
Each row in the table shows:
| Column | Description |
| ---------------- | --------------------------------------------------------------------- |
| **App name** | The display name of the integration |
| **Created date** | When the integration was created |
| **Status** | **Enabled** (active, users can interact) or **Disabled** (turned off) |
| **Actions** | Open integration configuration |
## Integration configuration
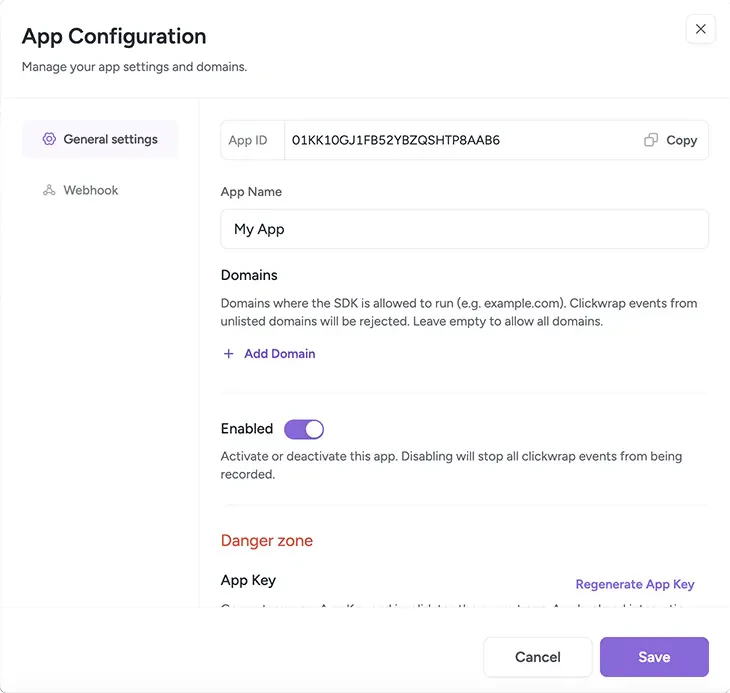 Click the gear icon to open the **Integration Configuration** window. This is where you manage settings for a specific integration, including its name, domains, status, and security credentials.
### App ID
The **App ID** is a unique identifier used by your developers when integrating with the ClickTerm API. It is displayed at the top of the configuration window.
### App Name
You can edit the display name using the **App Name** field. This name is used only inside the ClickTerm Dashboard and has no effect on API behavior.
Choose a descriptive name so your team can easily identify each integration
(for example: "Mobile App", "Web Platform", "QA Environment").
### Regenerate App Key
Creates a new App Key for this integration. Regenerate the key if:
* The current key may be compromised
* You lost your key
* You want to revoke access from older environments
After regeneration, you must update your integration code with the new key.
The App Key must be stored securely. Once you close the configuration window,
the key will be hidden from view.
### Delete app
Removes the integration from your account. Deleting an integration disables all clickwrap activity associated with it.
This action cannot be undone. Use this option only when you are certain
the integration is no longer needed.
### Callback URL
Click the gear icon to open the **Integration Configuration** window. This is where you manage settings for a specific integration, including its name, domains, status, and security credentials.
### App ID
The **App ID** is a unique identifier used by your developers when integrating with the ClickTerm API. It is displayed at the top of the configuration window.
### App Name
You can edit the display name using the **App Name** field. This name is used only inside the ClickTerm Dashboard and has no effect on API behavior.
Choose a descriptive name so your team can easily identify each integration
(for example: "Mobile App", "Web Platform", "QA Environment").
### Regenerate App Key
Creates a new App Key for this integration. Regenerate the key if:
* The current key may be compromised
* You lost your key
* You want to revoke access from older environments
After regeneration, you must update your integration code with the new key.
The App Key must be stored securely. Once you close the configuration window,
the key will be hidden from view.
### Delete app
Removes the integration from your account. Deleting an integration disables all clickwrap activity associated with it.
This action cannot be undone. Use this option only when you are certain
the integration is no longer needed.
### Callback URL
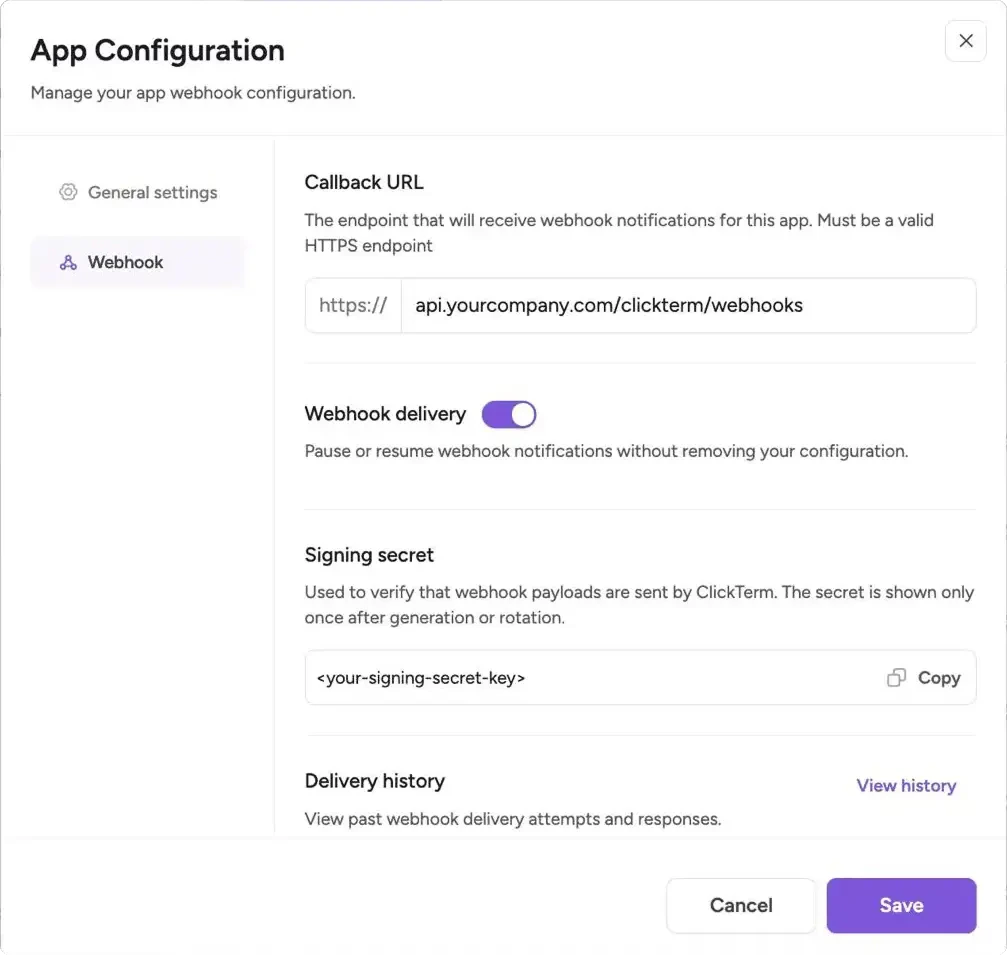 The **Callback URL** tells ClickTerm where to send backend event notifications for this integration.
* Use a public HTTPS endpoint that accepts `POST` requests
* Configure this when you want ClickTerm to notify your backend after verified clickwrap events
* Keep the endpoint stable to avoid missed deliveries
Webhooks are typically used for asynchronous processing such as syncing
consent records, triggering workflows, or updating internal systems after
a verified event.
### Webhook delivery
The **Webhook delivery** toggle controls whether ClickTerm sends webhook events to your configured endpoint.
* **Enabled**: Events are delivered in real time
* **Disabled**: Delivery is paused without removing configuration
> Use this to temporarily stop incoming webhook traffic during maintenance or debugging without losing your setup.
### Webhook signing secret
Each integration includes a webhook signing secret used to verify that incoming webhook requests were sent by ClickTerm.
* Store the signing secret in your backend secret manager or environment variables
* Treat secret rotation the same way you would App Key rotation
* Verify every webhook request before processing its payload
Do not store webhook secrets in client-side code or source control. Signature
verification must happen on your backend.
### Delivery history
The **Delivery history** provides a log of recent webhook delivery attempts.
* View request payloads, response status codes, and timestamps
* Helps diagnose failed deliveries or endpoint issues
* Useful for debugging webhook integrations
## Related
Get started with the ClickTerm API and SDKs.
Configure webhook delivery and verify webhook signatures.
How App ID and App Key work for API authentication.
The **Callback URL** tells ClickTerm where to send backend event notifications for this integration.
* Use a public HTTPS endpoint that accepts `POST` requests
* Configure this when you want ClickTerm to notify your backend after verified clickwrap events
* Keep the endpoint stable to avoid missed deliveries
Webhooks are typically used for asynchronous processing such as syncing
consent records, triggering workflows, or updating internal systems after
a verified event.
### Webhook delivery
The **Webhook delivery** toggle controls whether ClickTerm sends webhook events to your configured endpoint.
* **Enabled**: Events are delivered in real time
* **Disabled**: Delivery is paused without removing configuration
> Use this to temporarily stop incoming webhook traffic during maintenance or debugging without losing your setup.
### Webhook signing secret
Each integration includes a webhook signing secret used to verify that incoming webhook requests were sent by ClickTerm.
* Store the signing secret in your backend secret manager or environment variables
* Treat secret rotation the same way you would App Key rotation
* Verify every webhook request before processing its payload
Do not store webhook secrets in client-side code or source control. Signature
verification must happen on your backend.
### Delivery history
The **Delivery history** provides a log of recent webhook delivery attempts.
* View request payloads, response status codes, and timestamps
* Helps diagnose failed deliveries or endpoint issues
* Useful for debugging webhook integrations
## Related
Get started with the ClickTerm API and SDKs.
Configure webhook delivery and verify webhook signatures.
How App ID and App Key work for API authentication.