> ## Documentation Index
> Fetch the complete documentation index at: https://docs.clickterm.com/llms.txt
> Use this file to discover all available pages before exploring further.
# Team management
> Invite team members, assign Admin or Member roles, and manage access to your ClickTerm workspace.
The **Team Management** section allows you to control who has access to your ClickTerm workspace. From here, you can invite new team members, assign roles, and monitor each member's status.
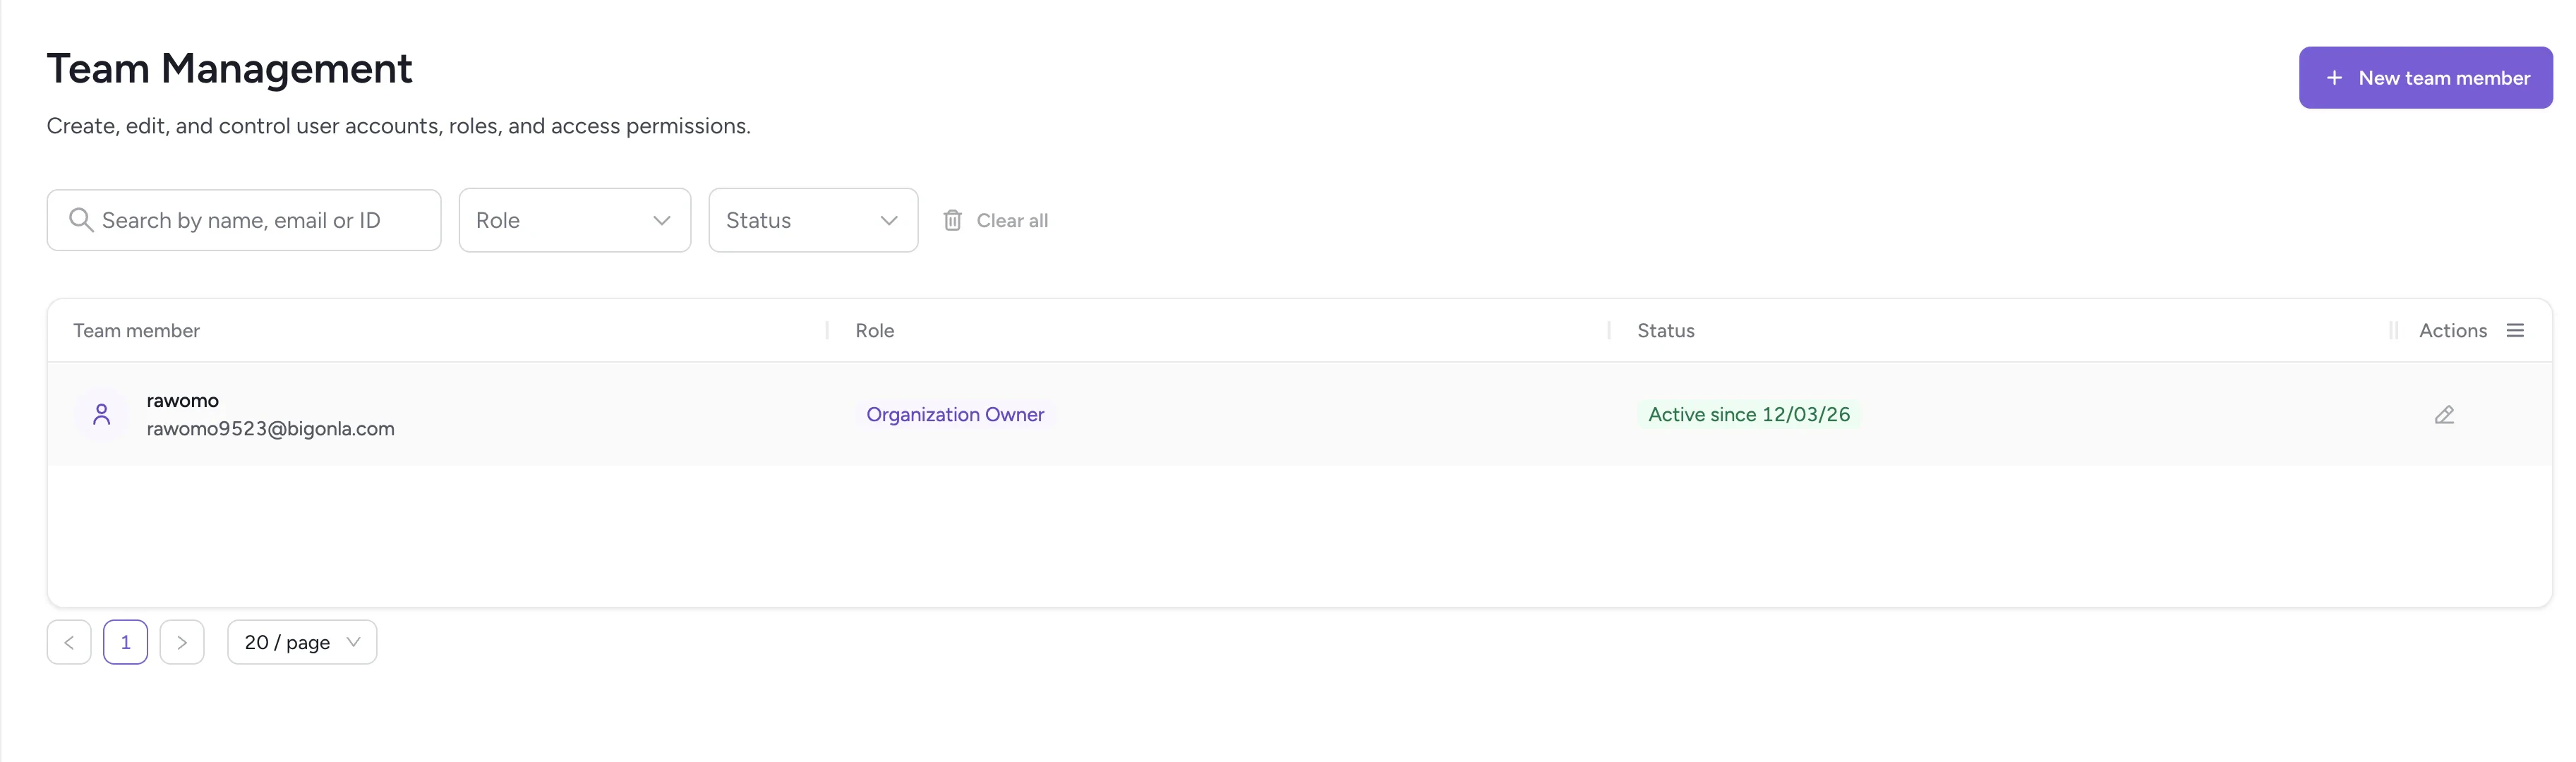 The **Organization Owner** role is assigned to the person who created the workspace
but can be reassigned to another team member in the future.
## Roles
There are two assignable roles when adding a new team member:
### Admin
Admins can manage all workspace settings, including:
* Adding and removing team members
* Modifying roles
* Managing integrations
* Adjusting application settings
Admins have full access and can perform all actions but cannot assign themselves Organization Owner.
### Member
Members can:
* View and use applications
* Interact with templates, events, and dashboards
Members **cannot**:
* Manage other team members
* Modify roles
* Change workspace-level settings (like organization details)
This role is suitable for users who need operational access but not administrative control.
## Adding a new team member
Click **New team member** to open the invitation dialog.
The **Organization Owner** role is assigned to the person who created the workspace
but can be reassigned to another team member in the future.
## Roles
There are two assignable roles when adding a new team member:
### Admin
Admins can manage all workspace settings, including:
* Adding and removing team members
* Modifying roles
* Managing integrations
* Adjusting application settings
Admins have full access and can perform all actions but cannot assign themselves Organization Owner.
### Member
Members can:
* View and use applications
* Interact with templates, events, and dashboards
Members **cannot**:
* Manage other team members
* Modify roles
* Change workspace-level settings (like organization details)
This role is suitable for users who need operational access but not administrative control.
## Adding a new team member
Click **New team member** to open the invitation dialog.
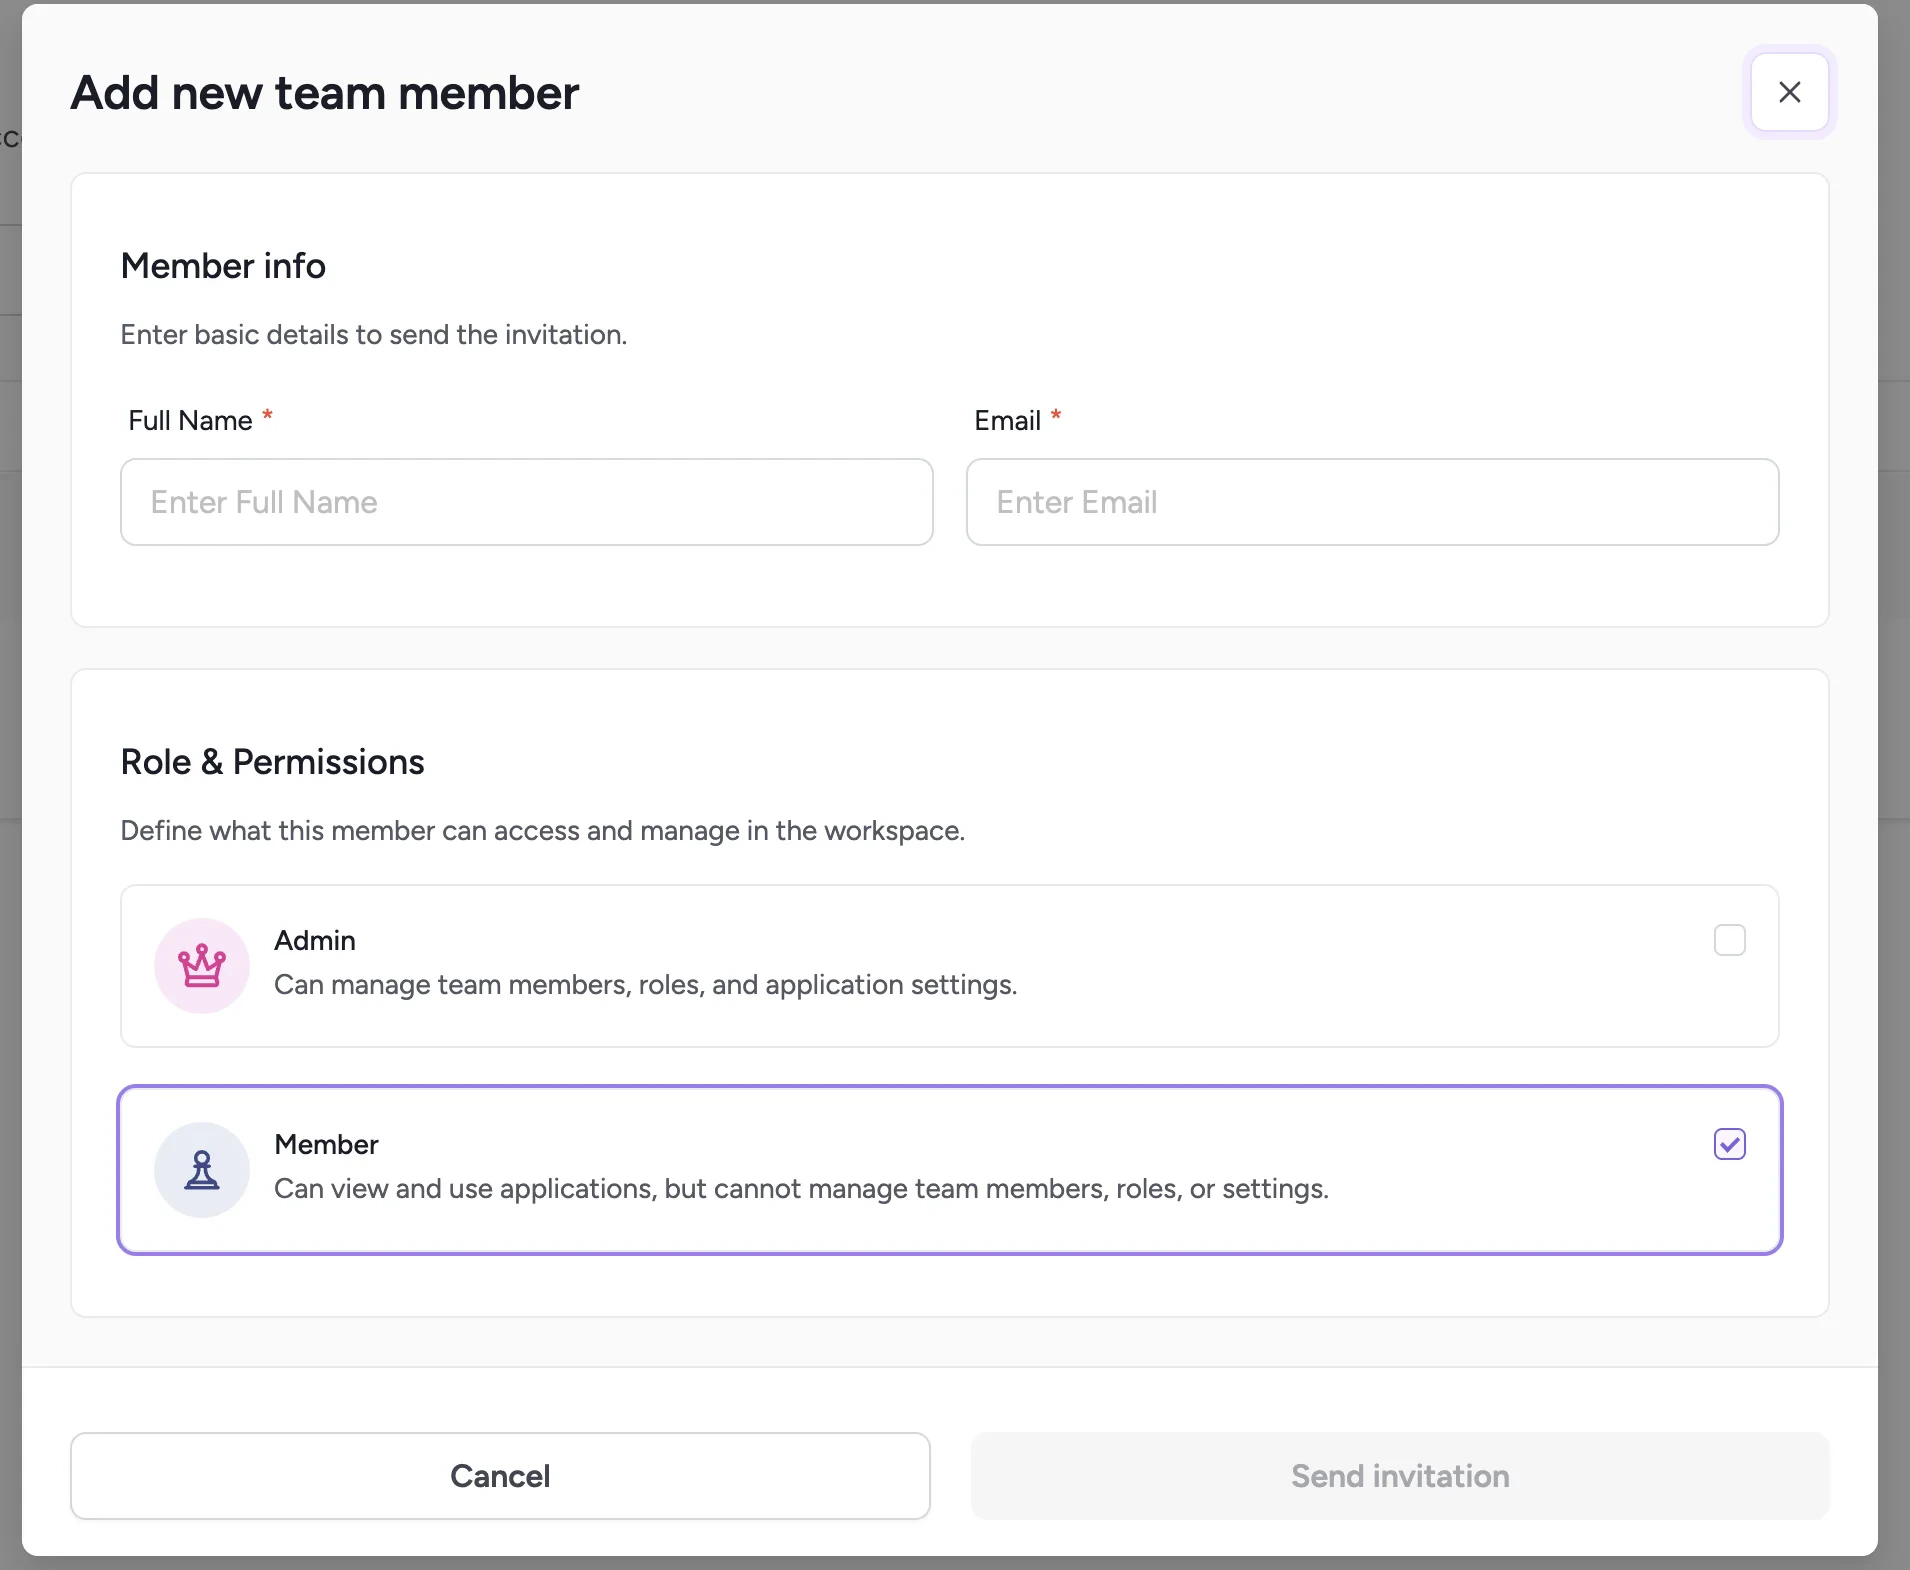 Provide the person's **Full Name** and **Email address**.
An invitation will be sent to this email.
Choose either **Admin** or **Member**.
### Member statuses
| Status | Meaning |
| ------------------ | ---------------------------------------------------------------------- |
| **Active** | The user accepted the invitation and is currently active |
| **Pending** | The invitation was sent but has not yet been accepted |
| **Expired invite** | The invitation link expired before the user joined — you can resend it |
## Managing team members
Organization owners and admins can:
* Change a member's name and email
* Update their role
* Resend or cancel an invitation (if pending)
* Delete a team member
Deleting a team member cannot be undone.
## Related
Review system activity and API usage logs.
View your subscription tier and usage metrics.
Provide the person's **Full Name** and **Email address**.
An invitation will be sent to this email.
Choose either **Admin** or **Member**.
### Member statuses
| Status | Meaning |
| ------------------ | ---------------------------------------------------------------------- |
| **Active** | The user accepted the invitation and is currently active |
| **Pending** | The invitation was sent but has not yet been accepted |
| **Expired invite** | The invitation link expired before the user joined — you can resend it |
## Managing team members
Organization owners and admins can:
* Change a member's name and email
* Update their role
* Resend or cancel an invitation (if pending)
* Delete a team member
Deleting a team member cannot be undone.
## Related
Review system activity and API usage logs.
View your subscription tier and usage metrics.