> ## Documentation Index
> Fetch the complete documentation index at: https://docs.clickterm.com/llms.txt
> Use this file to discover all available pages before exploring further.
# Widget customization
> Customize the appearance and behavior of the ClickTerm clickwrap dialog from the dashboard.
**Prerequisites:** [SDK v2.1+](/dev/resources/changelog) and an existing [template](/product/getting-started/first-clickwrap).
Starting from **SDK version 2.1 and above**, the clickwrap dialog can be fully customized directly from the ClickTerm Dashboard — no additional SDK configuration required.
All customization settings are managed at the **template level** in the web interface. Changes apply to **all versions** of the template.
## How to customize
Go to [Templates](https://app.clickterm.com/templates) and open the desired template.
You'll be redirected to the customization screen with a live preview.
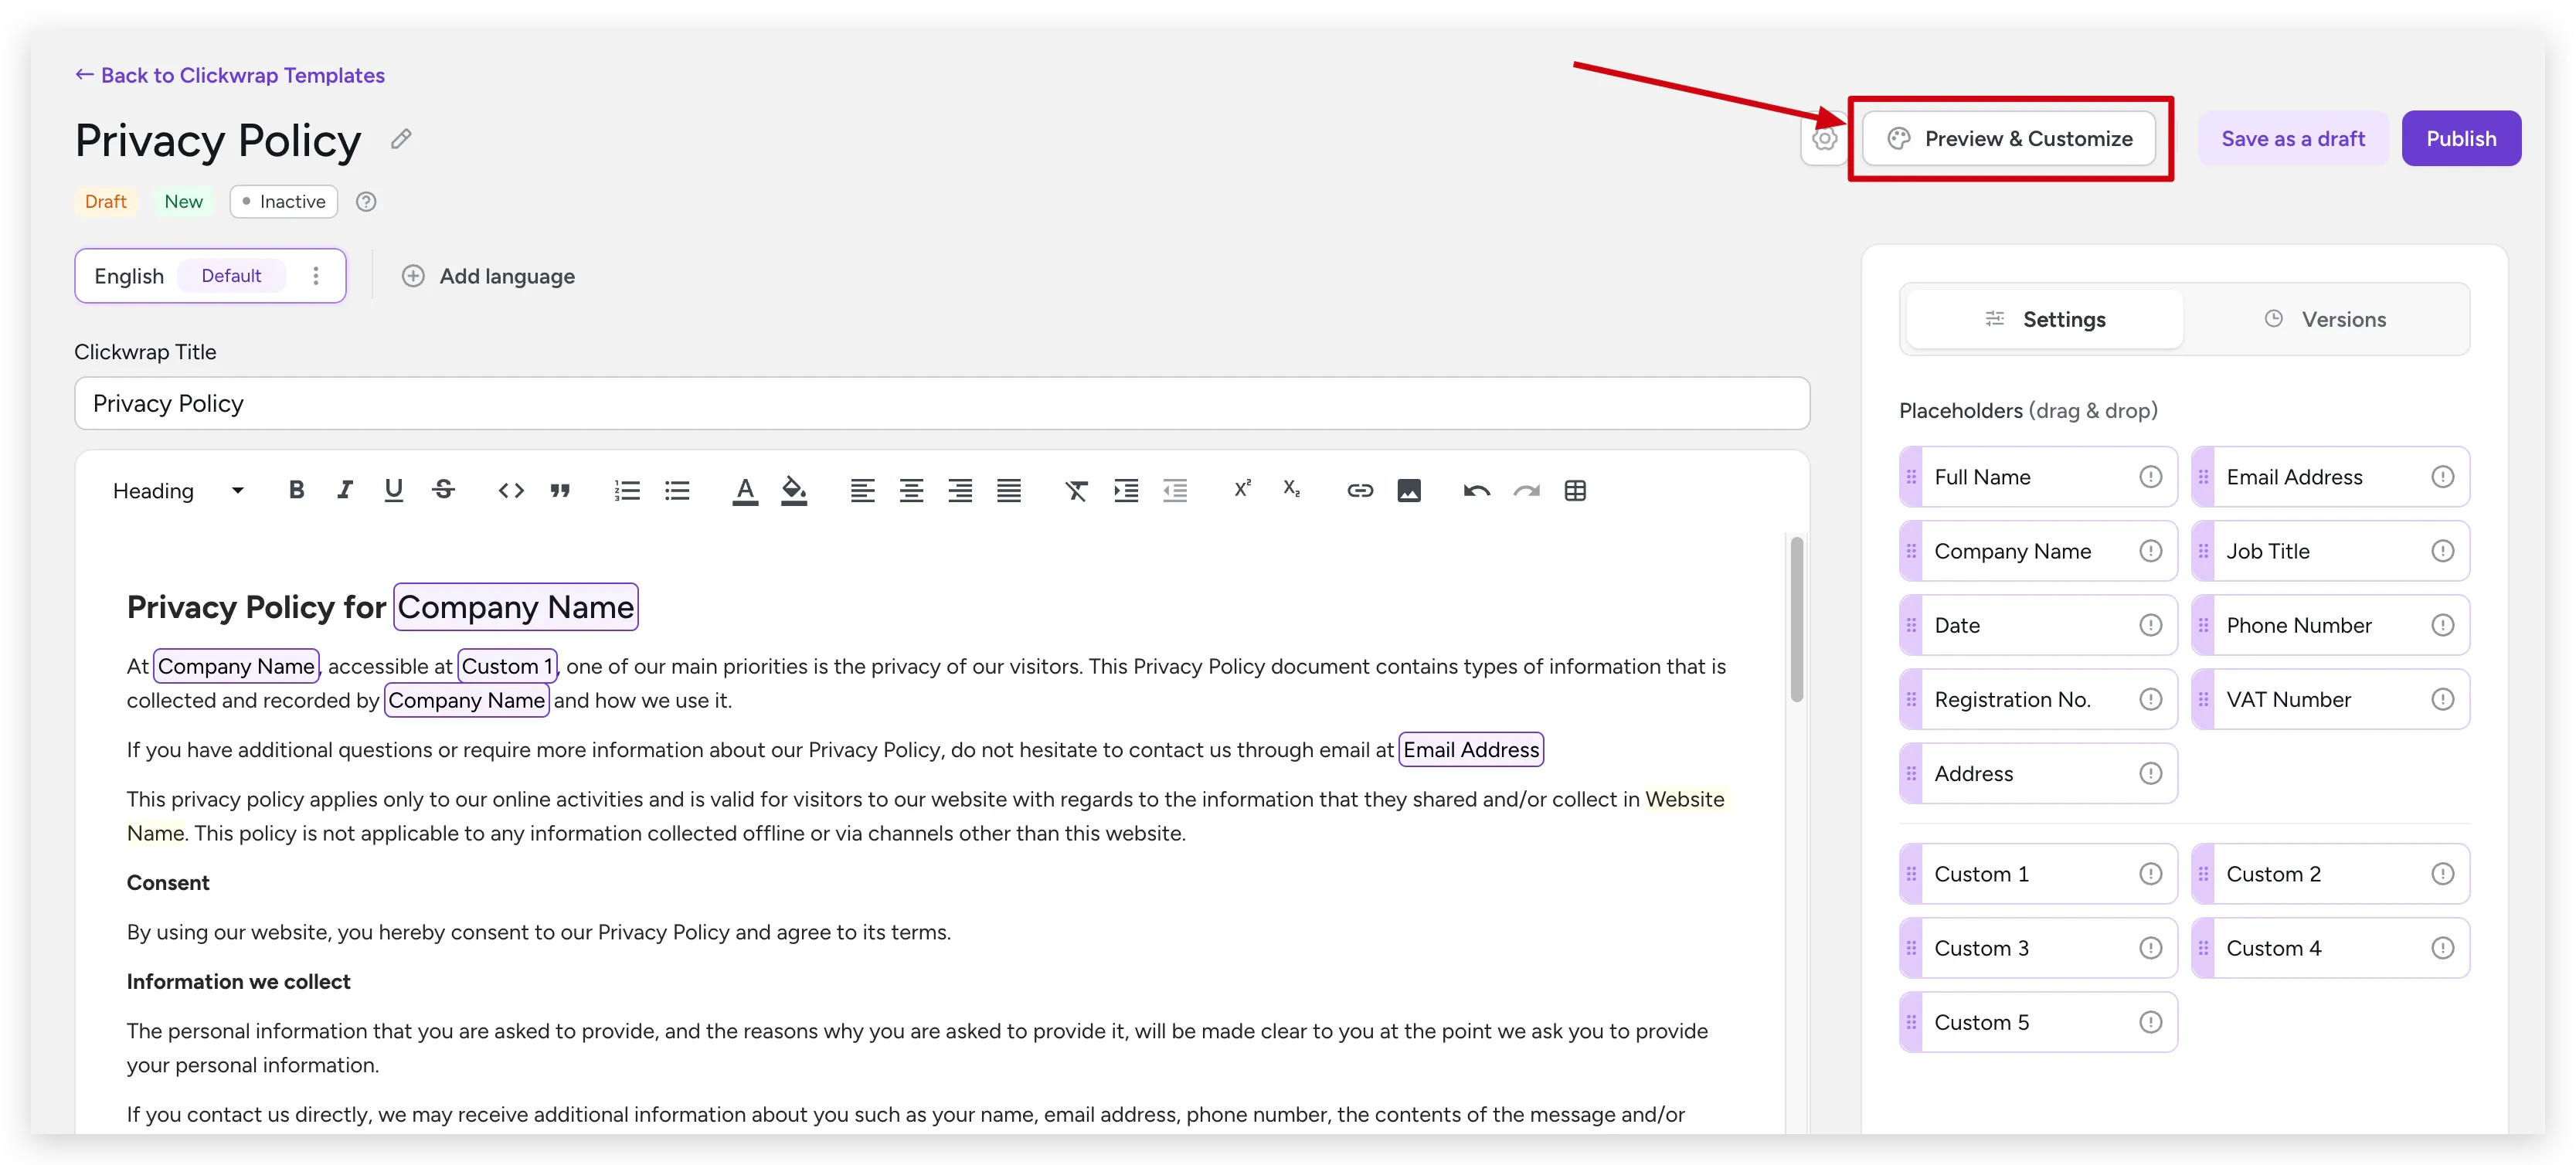 The **left panel** shows a real-time preview. The **right panel** contains all customization options. Changes are reflected immediately in the preview.
 Choose one of two saving options:
* **Save for this template** — Applies only to the current template
* **Save as default** — Sets as the default for all templates without custom configuration
Changes are reflected in the SDK after saving. It may take a few minutes
for the new configuration to propagate.
Some customization options are available only on paid plans. Visit [clickterm.com/pricing](https://clickterm.com/pricing) for plan details.
Dashboard customization applies to **dialog mode** only. Inline clickwrap
appearance is customized via code using the `style` option — see
[ClicktermDom styling reference](/dev/sdk/web/clickterm-dom#styling-reference).
## Related
Detailed overview of the customization screen.
How to show the dialog from your integration code.
Choose one of two saving options:
* **Save for this template** — Applies only to the current template
* **Save as default** — Sets as the default for all templates without custom configuration
Changes are reflected in the SDK after saving. It may take a few minutes
for the new configuration to propagate.
Some customization options are available only on paid plans. Visit [clickterm.com/pricing](https://clickterm.com/pricing) for plan details.
Dashboard customization applies to **dialog mode** only. Inline clickwrap
appearance is customized via code using the `style` option — see
[ClicktermDom styling reference](/dev/sdk/web/clickterm-dom#styling-reference).
## Related
Detailed overview of the customization screen.
How to show the dialog from your integration code.